Kmbox Net Connection Guide
Shared guide index: README.md
Objective
Use Kmbox Net network-controlled keyboard and mouse controller in CVM. Kmbox Net is a keyboard and mouse control device that communicates over the network, featuring high speed, strong stability, and high security.
What is Kmbox Net
Kmbox Net is a network-controlled keyboard and mouse controller with the following features:
- High Security: Protocol is not public, each box has independent IP, port, and hardware encoding, uses blocking socket communication, cannot be scanned
- Strong Stability: Will not white screen and restart like serial communication
- High Speed: 100M dedicated network, communication speed is 100 times that of the original B board, close to 1000 calls per second
- Automatic Default Human Trajectory: No keyboard and mouse data anomalies
- No Mouse Adaptation Required: Strong universality
- Supports Monitoring Physical Keyboard and Mouse: Blocks physical keyboard and mouse functions, convenient for writing software
- Supports Physical Keyboard and Mouse Learning and Copying: Supports driver passthrough mode
Important Note: - Kmbox Net only has stronger hardware performance compared to Kmbox B - However, in terms of API, serial port API is better than Kmbox Net
Technical Information: - Kmbox Net 8K version's underlying code is based on Cherry USB
Prerequisites
- One Kmbox Net box
- Two blue cables (USB cables)
- Windows 10 or 11 system
- Two computers (single machine mode can connect to the same computer)
Connection Steps
01 Unboxing Introduction
Kmbox Net default includes the following accessories:
- One Kmbox Net box
- Two blue cables
02 How to Connect Cables
The back of the box has interface names. Generally connect according to the following diagram:
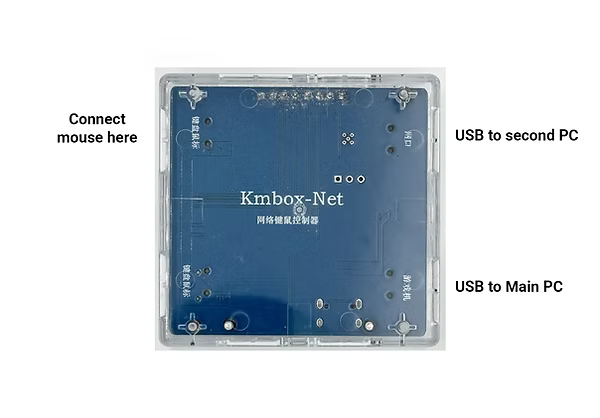
- Game Console Interface (1): Connect to target computer (the controlled computer)
- Network Port (2): Connect to control computer (the computer running CVM)
Note: - If it's single machine mode, both network port and game console port connect to the same computer - If computer B controls computer A, then game console interface (1) connects to computer A, network port (2) connects to computer B
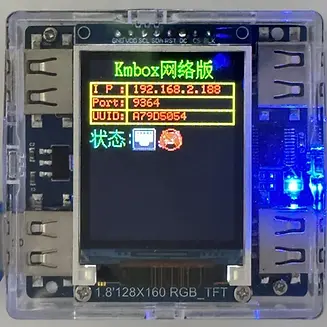
After connection is complete, the Kmbox Net screen should display as shown below:
03 Install Network Card Driver (Install driver on computer connected to network port)
- Connect the network port USB cable to the control computer (second PC)
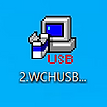
- On the second PC, run
2. WCHUSBNICdriver installer as administrator
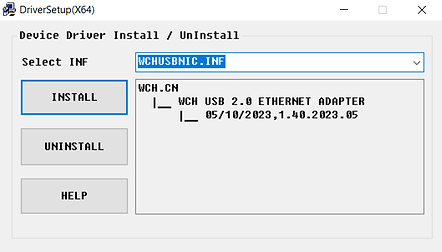
- Select
INSTALLto install
- After successful installation, you should see "Driver Install Success!" message
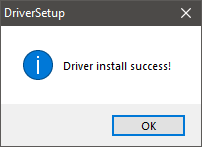
- Reboot the second PC
Download Network Card Driver: Click to download network card driver
Notes: - Install the network card driver on whichever computer the network port USB cable is connected to - Don't install driver on computer A but connect cable to computer B - If network card driver is installed but no response: - Check if network port cable is connected? - Confirm driver is installed on the correct computer - Confirm running driver installer as administrator
04 Modify Network Card IP (Modify network card IP on computer connected to network port)
Important: Ensure main PC and second PC are connected to the same local network (e.g., your home Wi-Fi)
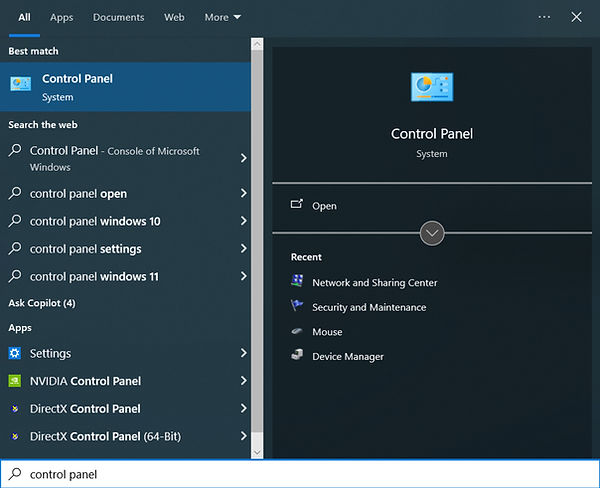
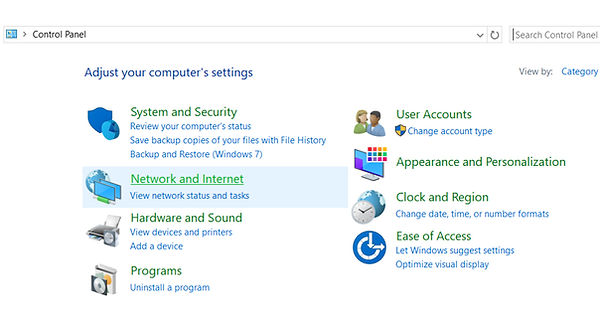
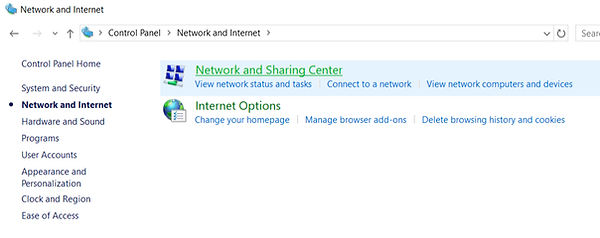
Open Control Panel → Network and Sharing Center
- Open Control Panel on the second PC
- Click "Network and Internet"
- Click "Network and Sharing Center"
- Click "Change adapter settings"
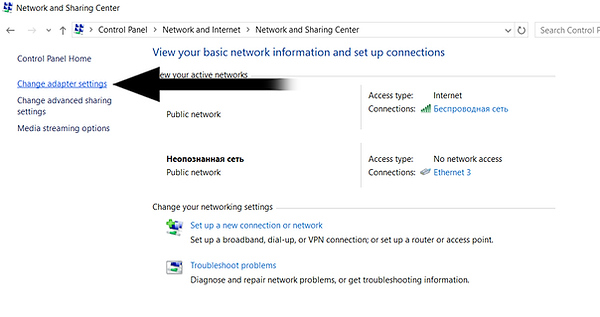
Modify Network Card IP
- Find "USB 2.0 Ethernet Adapter" or similar network card device (this is the box's network card)
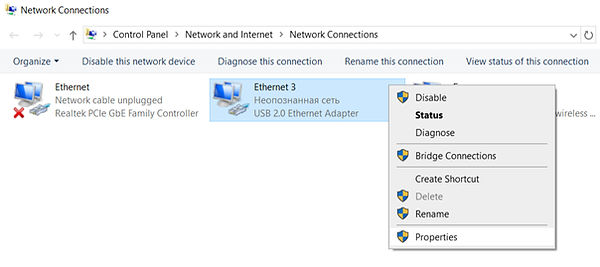
If you don't see this device, disconnect and reconnect the USB cable from Kmbox to the second PC.
-
Right-click on this network card and select "Properties"
-
Make sure "Internet Protocol Version 6 (TCP/IPv6)" is disabled
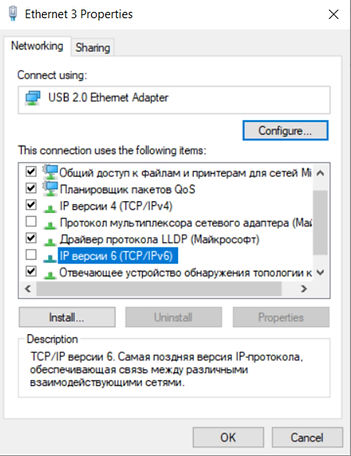
- Make sure "Internet Protocol Version 4 (TCP/IPv4)" is enabled, click on it and select "Properties"

- Select "Use the following IP address"
- Set IP address to:
192.168.2.100 - Subnet mask:
255.255.255.0 - Leave other fields empty
- Click "OK" to save
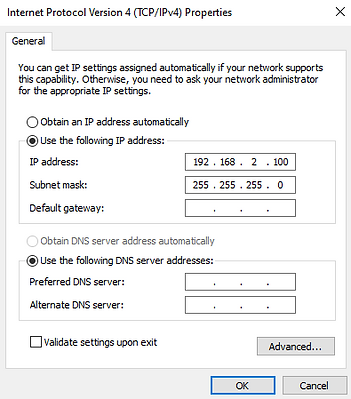
Important Notes:
- Modify the box's network card, not your own local network card
- Usually a new network card will appear on the page (the box's network card), modify the box's network card
- If you lose internet after modifying IP, you may have modified the wrong network card
- If the above IP address doesn't work, you can try using: 192.168.2.189
Check Network Connectivity
- Open Command Prompt (CMD)
- Execute
ping 192.168.2.1(the box's default IP) - If you can ping successfully, the connection is successful
CVM Configuration Steps
First Connection
- Open CVM's
Generaltab - Set
Input APItoNETor corresponding network mode - When starting for the first time, you need to enter Kmbox Net data (IP, Port, UUID)
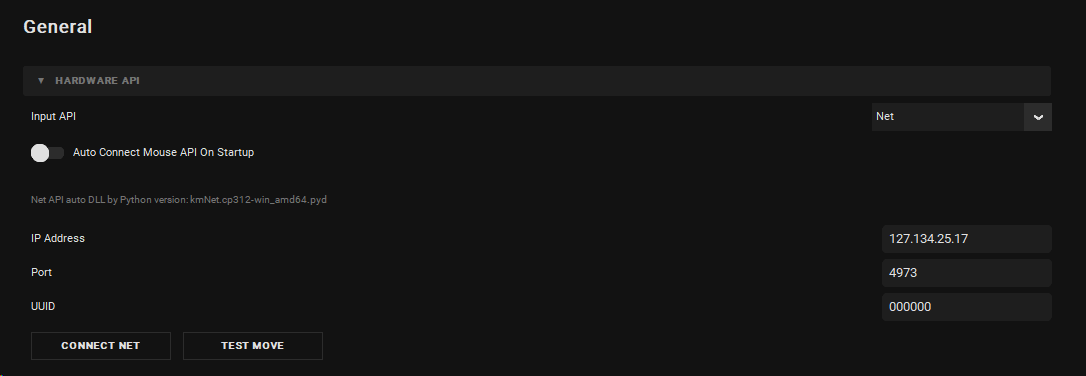
Save Configuration
To avoid entering Kmbox Net data every time:
- Go to config section in CVM
- Select any config and click save
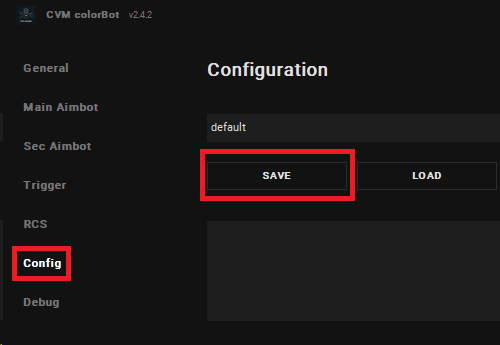
This way the settings will be saved and will be used automatically on next startup.
Recommended Starting Values
Input API:NETIP Address:192.168.2.1Port: Set according to actual box port (usually default value)auto_connect_mouse_api: Set tofalseinitially, change totrueafter stable
Verification Checklist
- CVM can connect to Kmbox Net without timeout errors
- Micro-movement test is smooth, direction is correct
- After restarting CVM, can connect again with the same configuration
- Network ping test is successful
Troubleshooting
Cannot Connect
- Check if network port cable is correctly connected
- Confirm network card driver is correctly installed on the computer connected to network port
- Confirm IP address is set correctly (
192.168.2.100) - Confirm box's IP address (usually
192.168.2.1) - Check if firewall is blocking the connection
- Confirm two computers are on the same network (except single machine mode)
Network Card Driver Installed But No Response
- Check if network port cable is connected?
- Install network card driver on whichever computer the network port USB cable is connected to
- Don't install driver on computer A but connect cable to computer B
Why No Internet After Modifying IP
- If you lost internet, you may have modified the wrong network card
- Usually a new network card will appear on the page (the box's network card), modify the box's network card instead of your own local network card
- See the network card modification tutorial above for specific operations
Mouse Doesn't Work
If the mouse connected through Kmbox doesn't work on the main PC:
- Make sure Kmbox is connected correctly
- Try connecting USB cable to another port on the main PC
- Try using another mouse
- Try connecting mouse to another USB port on Kmbox
Mouse Sensitivity
Change the sensitivity in the game settings.
Movement Not Smooth or Delayed
- Check network connection quality
- Confirm using high-quality USB cables
- Avoid using USB Hub, connect directly to computer USB port
- Check if other programs are occupying network resources
Make sure you have configured everything correctly.
Mouse Obviously Not Responsive and High Latency in Bypass Mode
- This situation is generally because the mouse exceeds specifications
- Net only supports up to Full Speed (12Mbps). If your device is High Speed (480Mbps), Net box will only recognize it as Full Speed
- USB protocol specifies: Full Speed devices 1ms per frame, High Speed devices 0.125ms per frame
- If a high-speed device wants 1KHZ polling rate, its defined value is 8, but the box can only recognize Full Speed, not High Speed, so when the box reads 8, it means reading data every 8ms, thus causing high latency issues
- For perfect passthrough support, please choose the NB version with higher speed rating
- If you want to use high-speed devices on Net, please choose KM mode
Important Reminder: Kmbox Net's Bypass mode is suspected to be a fake Bypass, PID/VID are not correctly passed through, may not fully simulate real physical keyboard and mouse devices.
Cheat Doesn't See Kmbox
If the cheat doesn't see Kmbox at startup:
- Make sure your main and second PCs are connected to the same local network (e.g., your home Wi-Fi)
- Try using this IP address in "Internet Protocol Version 4 (TCP/IPv4)" Properties:
192.168.2.189
Firmware Update
If your Kmbox Net firmware differs from the current one, it's recommended to update (flash) it. This can improve performance, fix bugs, and prevent detection.
Latest Version: 2026.2.12 (Last update date: February 12, 2026)
Update Steps
-
Connect USB cable to your main PC
-
Press and hold this small black button inside the Kmbox using a screwdriver or other thin object
And at the same time connect the USB cable to this connector
The Kmbox screen should turn white, and this blue diode should start flashing rapidly. If this doesn't happen, then try to hold the button again and reconnect the USB cable.
- On your main PC, download and extract the upgrade tool, then install the driver
Download Upgrade Tool: Click to download upgrade tool
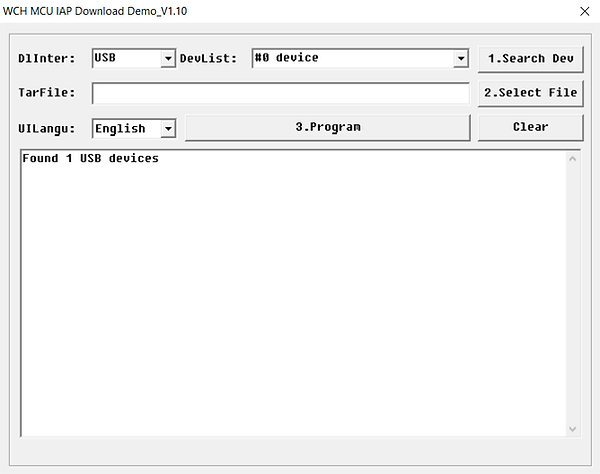
- Launch the Upgrade Tool. Click Search Device. In the information line, it should be written "Found 1 USB devices"
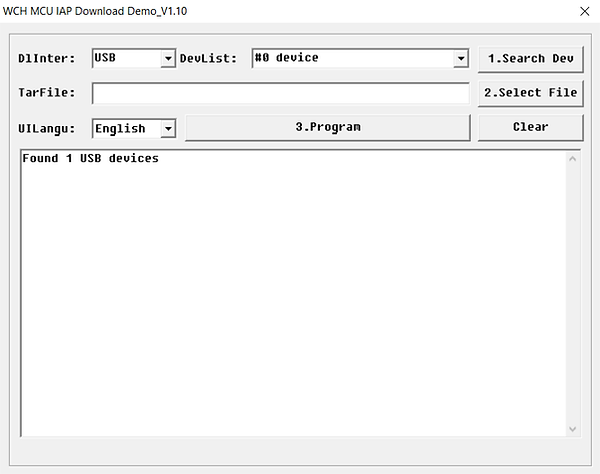
- Click Select file
- Navigate to the folder where you downloaded the firmware file
Download Firmware: - Latest Firmware: Click to download latest firmware - Other Versions: Click to view history versions
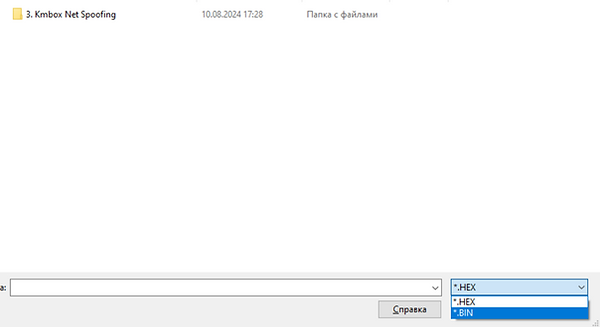
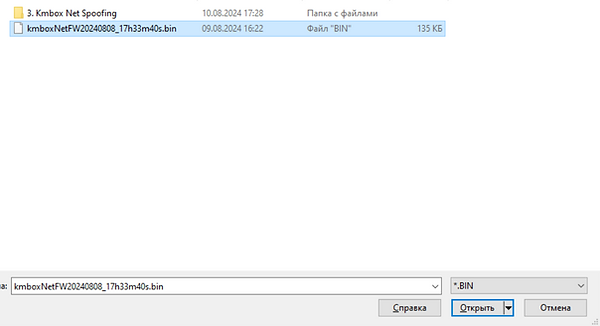
Change the type of files displayed to .BIN
-
Select the firmware file (e.g.,
kmboxnetfw20240808.bin) -
And click "Program"
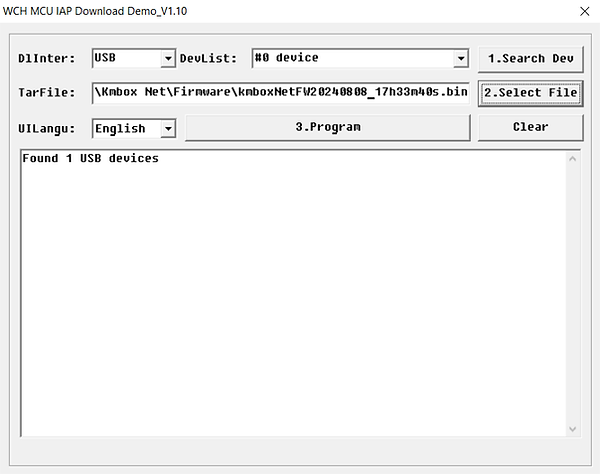
- Wait a few seconds. After the end of the process, you will see a message
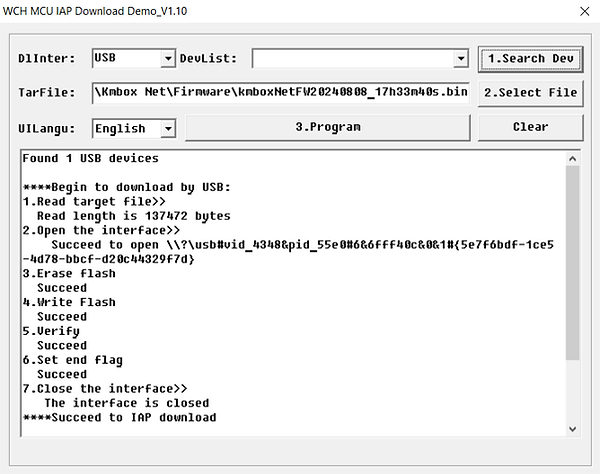
Important: Firmware update is complete. Now we need to spoof Kmbox according to the guide below. This must be done every time after updating the firmware on Kmbox Net.
Spoofing Kmbox Net
Spoofing can make Kmbox Net appear as your real mouse, improving security.
Spoofing Steps
-
Disconnect all cables and mouse from Kmbox
-
Connect your mouse to your main PC as usual, without Kmbox
-
On your main PC, download and run
USBLogView.exe(you can download it from the official Kmbox Net resources or use a USB device viewer tool), make the program fullscreen

- Unplug your mouse from main PC and plug it back in
You will see Vendor ID and Product ID of your mouse
We will need this data later, write it down somewhere in one line without a space
In my case it will look like this: 046dc077
Important! On some mice, for example on my Steelseries Rival 3 Wireless, Vendor ID and Product ID contains only numbers and looks like this: 10381830. You will fail the spoofing process on such a mouse, I recommend using any other one.

- Connect Kmbox to your main and second PC
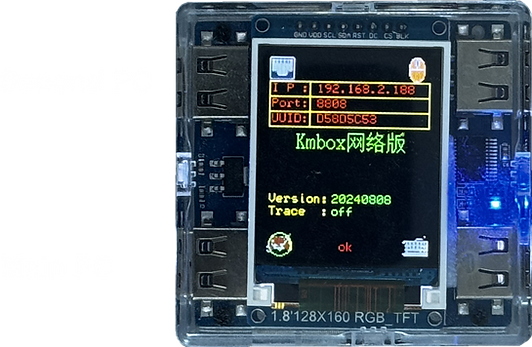
- On the second PC, download and extract the KmboxNet program
Run KmboxNet.exe
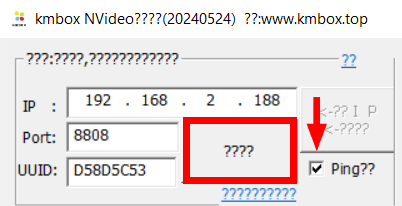
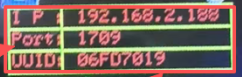
Enter IP, Port and UUID from your Kmbox Net
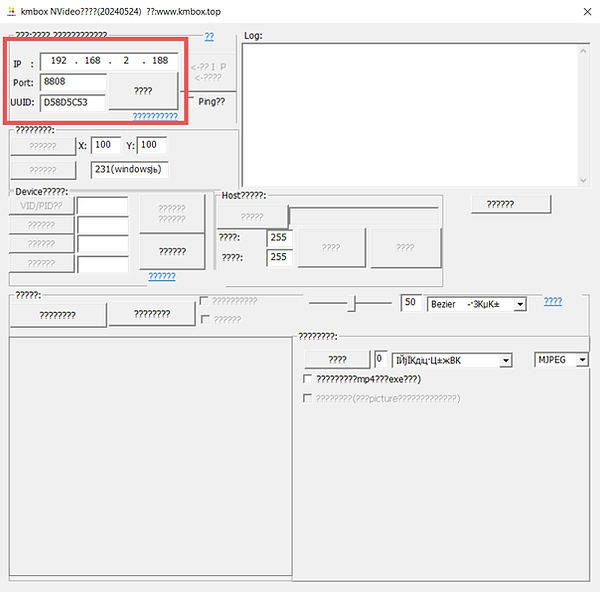
- Check "Ping" box and click on the big button
- A window should appear in which OK will be written at the end.
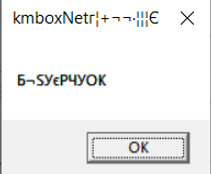
If it doesn't connect to the Kmbox: - Try to restart it by unplugging it from your main PC and plug it back in - Run the exe as admin
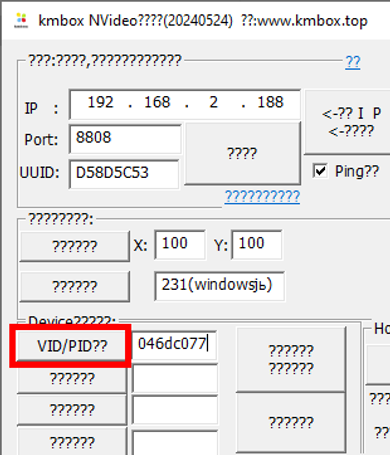
- Enter your Vendor ID and Product ID which we saved earlier in one line without a space (in my case it's
10381830)
And click VID/PID button
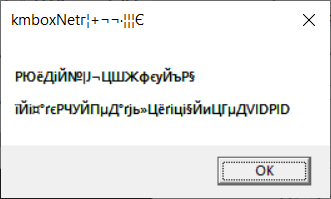
- You should see such a window which means that the process was successful
-
Go back to your main PC and open USBLogView.exe again, make the program fullscreen
-
Unplug the Kmbox from your main PC and plug it back in
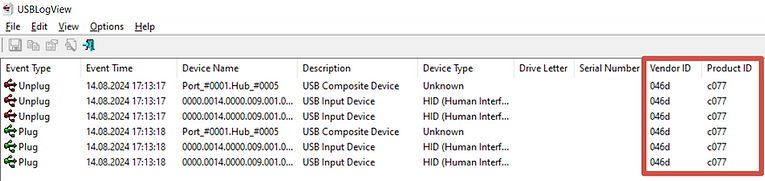
You should see the same Vendor ID and Product ID that you saw in Step 3
If it is, then the spoofing was successful
Advanced Settings
How to Enable Bypass Mode
Bypass mode allows physical keyboard and mouse to pass directly through the box. In Bypass mode, physical keyboard and mouse data is directly passed through to the target computer without processing by the box.
Important Warning: - This Bypass mode is suspected to be a fake Bypass - PID/VID are not correctly passed through, may not fully simulate real physical keyboard and mouse devices - Please be aware of related limitations and risks when using
Usage Notes: - In Bypass mode, if using high-speed devices (High Speed, 480Mbps), you may experience obvious lag and high latency issues - Net only supports up to Full Speed (12Mbps). If the device is High Speed (480Mbps), Net box will only recognize it as Full Speed - USB protocol specifies: Full Speed devices 1ms per frame, High Speed devices 0.125ms per frame - For perfect passthrough support, please choose the NB version with higher speed rating - If you want to use high-speed devices on Net, please choose KM mode
For specific setup methods, please refer to Kmbox Net Official Documentation.
How to Enable KM Mode
KM mode is one of Kmbox Net's working modes, which can be set in the box's host computer software.
How to Modify Curves
- Download the box's host computer control software
- After connecting the box, you can select hardware curve values and algorithm types
- Default curve is disabled. If you need to enable it, set it in the host computer software
Check Box Inherent Parameters
You can view the inherent parameters (IP, Port, UUID) on the box:
Related Resources
- Official Documentation: Kmbox Net User Manual
- Video Tutorial: YouTube Connection Tutorial Video
- Network Card Driver Download: Click to download network card driver
- Host Computer Software Download: Click to download KmboxNet host computer software